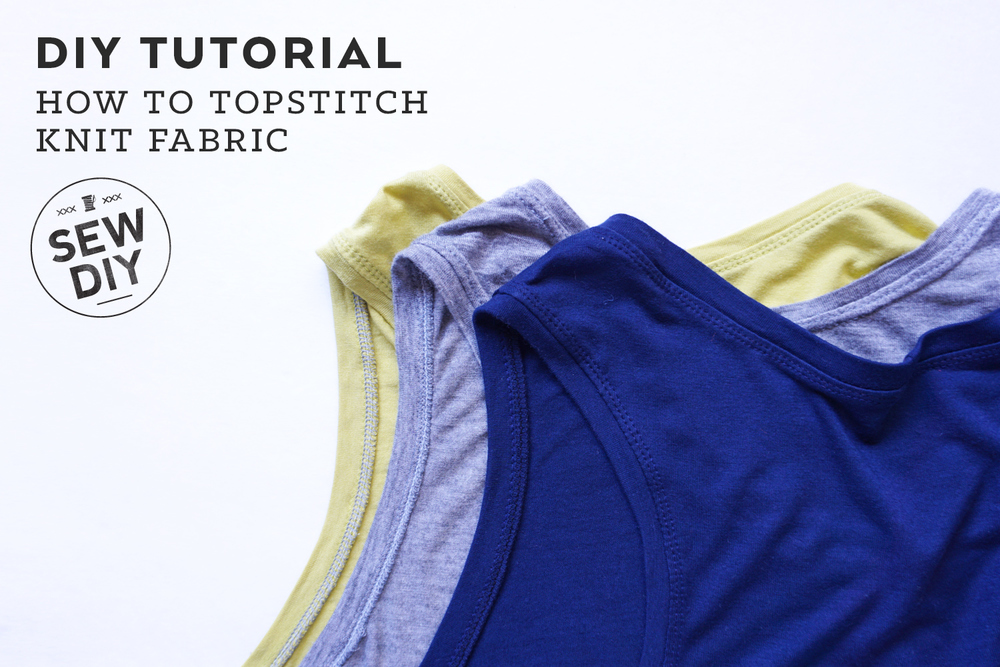
Quantcast
Channel: Blog - Sew DIY
Viewing all 289 articles
Browse latest View live

DIY Navy Racerback Tank

$
0
0
DIY Navy Racerback Tank | Sew DIY

When you find something that gets worn over and over and makes you feel like you’re totally cool but not even trying, then you need more of that thing. In shorter words, when you find something you like, you do it again. Et voila! Another solid colored racerback tank top.

DIY Navy Racerback Tank | Sew DIY

More often than not, the pieces that I wear over and over are the kind of boring ones. Like this little workhorse. This top is based off of an RTW tank that I traced a few months ago. I first made a grey tank and then an almost neon green dress version. I wasn’t completely satisfied with the fit on the dress so for this version, so I trimmed back the arm openings a bit. I’m pretty pleased with how it came out.

DIY Navy Racerback Tank | Sew DIY

This top is fairly easy to make one of these tops. Just cut out the front and back, and stitch them together at the sides and shoulders. Then the trickier part is to attach the binding to the neckline and armholes. I like to cut a crosswise strip of fabric about 90% of the length of the opening. I then make a loop from the binding, fold it in half and baste it to the opening. The basting is an extra step but I really like to do it to test if the fit is right. If all is good, I serge it onto the top and then press and topstitch. I’m going to post some tips for topstitching knits so check back in a few days or follow on bloglovin to stay up to date with all the posts.

DIY Navy Racerback Tank | Sew DIY DIY Navy Racerback Tank | Sew DIY

Once again, the fabric is something I picked up from a bargain bin in downtown LA. I’m so spoiled living here and having access to so much affordable fabric. Solid knits are great fabrics to pick up and add to the stash. I know I’ll always find a use for them and that whatever I make is going to be worn frequently. I have lots of knit fabric leftovers that I’m planning to make into undies. More on that later!

DIY Navy Racerback Tank | Sew DIY DIY Navy Racerback Tank | Sew DIY DIY Navy Racerback Tank | Sew DIY

Here I’m wearing this top with a pattern of my own design, the Baseball Skirt. This skirt is probably my easiest pattern to put together. (For reals, it’s easier than the Lou Box Top!) It’s a great casual piece that can be worn with sandals or sneakers to take you wherever you need to go all weekend long. I really love it made up in a soft and casual chambray and worn with a simple t-shirt and cardi. It’s easy to customize by changing the length, straightening the hem or playing with a fancy silk fabric. Go get yourself a copy of the pdf pattern and get started on your Spring/Summer wardrobe.


How to Topstitch Knit Fabric

$
0
0
How to Topstitch Knit Fabric | Sew DIY

Knit fabrics are great to wear and fun to sew with but they can be a little tricky to handle. I was intimidated by them for a long time but with a lot of practice and a few tricks I picked up along the way, I’ve been able to conquer those stretchy beasts. Today, I’m going to share my favorite method for topstitching knit fabrics plus some tips and insight on why knits can be so bothersome. And don't worry, you don't need a fancy machine, this can all be done on a conventional sewing machine. 

How to Topstitch Knit Fabric | Sew DIY

TIP ONE: Feed your fabric.

The big difference between sewing knits and woven fabric is the stretch. A basic sewing machine does a great job of feeding your woven fabric under the needle but it can be challenging to feed a stretchy knit fabric. The fabric can bunch up, get stuck in the throat plate and the stitch length will be uneven and wobbly.

I have two methods for helping feed your fabric through a conventional machine. Option 1, use a walking foot (on left in photo above) when stitching knits. The walking foot has feed dogs on the top that help move the fabric evenly under the needle. Option 2, (if you don’t have a walking foot) place strips of tissue paper underneath your fabric as you stitch. When you’re done, gently tear the paper away. The paper creates a stable base for the fabric that the feed dogs can grab onto and push under the needle. 

TIP TWO: Stitch with stretch

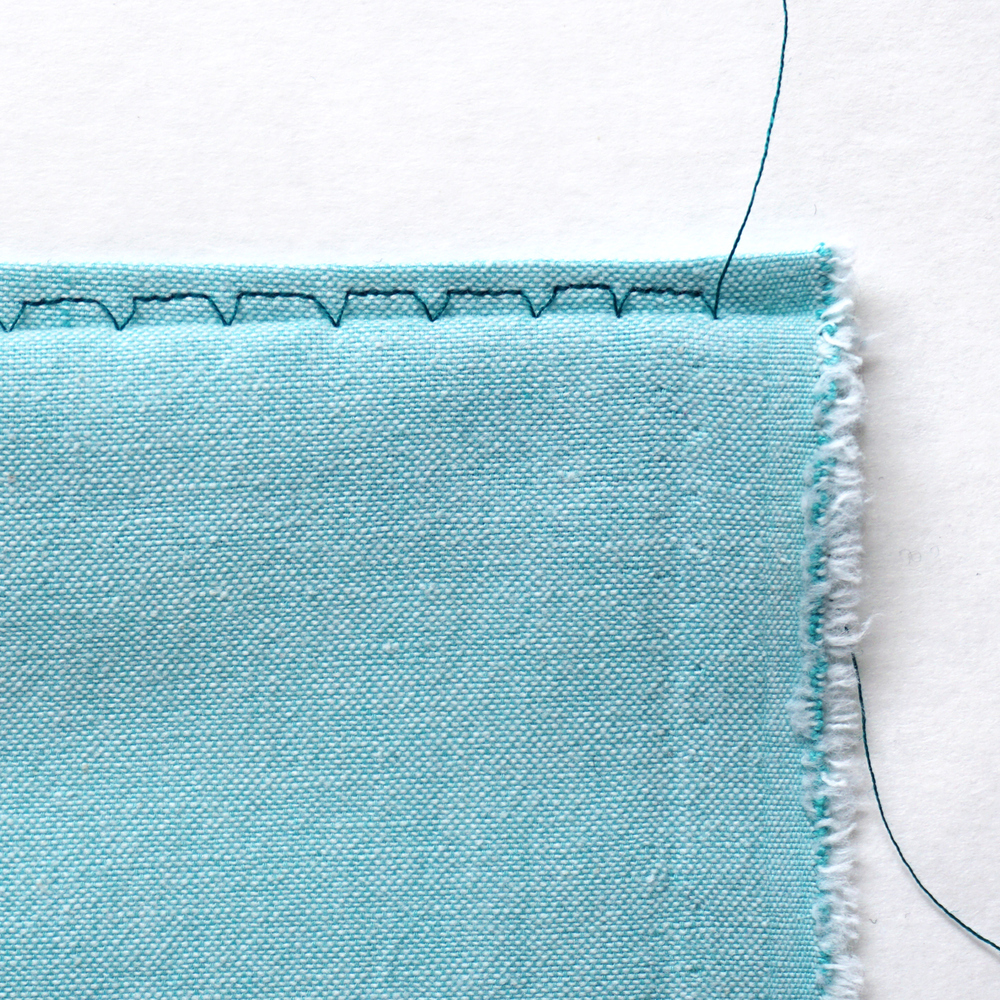
Your fabric is going to stretch as you wear it, so you want your stitches to stretch too. If the thread can't stretch, the stitching can break (you can actually hear a pop when this happens). To create a stretchy topstitch, use a twin needle or a zig zag stitch. The twin needle has two threads on the top and one on the bottom (the bobbin). The bobbin thread will be slightly stretched between the two top threads. I like to use wooly nylon (or fluff thread) in the bobbin. It’s a stretchy thread that will help your stitching lay flat. The zig zag stitch is also a great option for topstitching. It looks a little less professional than the twin needle but if your thread matches the fabric quite well you probably won't be able to see the stitching anyway. And sometimes the zig zag looks really cool. 

How to Topstitch Knit Fabric | Sew DIY

USING A TWIN NEEDLE

My machine (Brother CS-6000i) has specific threading instructions for using a twin needle and I recommend reading your manual to make sure you do it the way your machine likes. I first tried a twin needle when I was in high school and I just couldn’t get it to work. I bet if I had read the manual (or if sewing blogs existed back then :) I would have been able to make it work. I was scared to do it again for a long time after that because it didn’t work just that one time. But I finally gave it another go, read the manual and now I love it.

A twin needle is the best way to get two lines of stitching that are perfectly spaced from each other. There are varying widths of twin needles so you can have a little fun and try different looks. Above you can see the 2mm on the left and a 4mm on the right. I really love the wider needle but if I'm topstitching a narrow seam allowance in place (like on a neckline) I prefer the narrower needle. The wide needle can end up topstitching with one needle on the seam allowance and one on the outside which then creates a ridge.

Wooly Nylon Thread | Sew DIY

WOOLY NYLON THREAD

Discovering this thread was something of a revelation. The wooly nylon thread is a stretchy thread that's made up of multiple strands. I've read that it's often used when serging and with undergarments. So far I've only used it in the bobbin when topstitching and I totally love it.  When using regular thread in the bobbin, the two top threads can pull together a little and create a ridge. The stretch of the wool nylon lets the two top threads lay flat. Yay! I have one spool in off white and one in black and that's so far worked well for any project.  

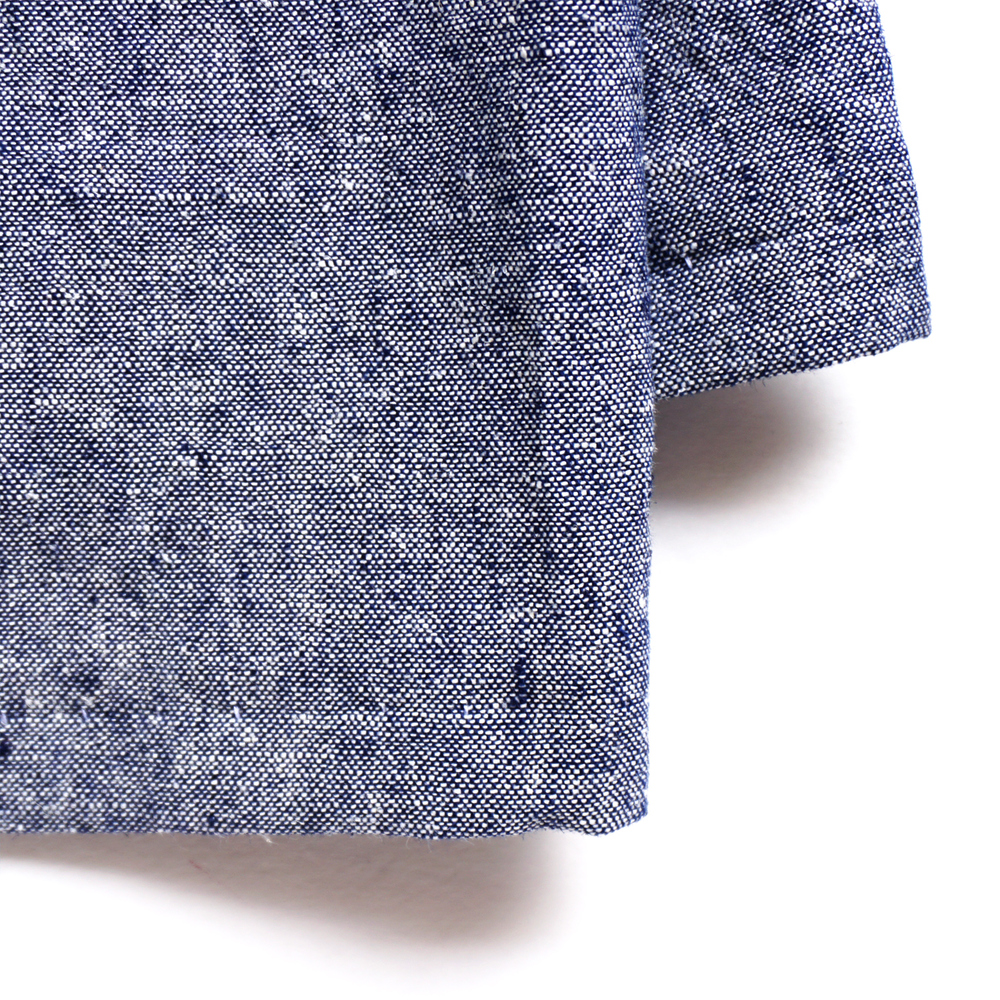
Now that you have all the background you’re ready to topstitch your knits! You don’t need a fancy machine but I do recommend a few supplies. This method can be used on hems or to finish a neck or arm binding.

How to Topstitch Knit Fabric | Sew DIY

How to Topstitch Knit Fabric

SUPPLIES

2 spools regular thread (You don't need to buy to full spools of the regular, just wind up a bobbin with the regular thread to use as the second "spool.")

Wooly Nylon Thread (aka fluff thread)

Twin Sewing Needle

Sewing Machine with Walking Foot
(or if you don’t have a walking foot, some strips of tissue paper as discussed above)

INSTRUCTIONS

1. By hand, loosely wind wooly nylon thread around bobbin.

2. Attach walking foot to machine and insert twin needle. Thread machine according to your machine’s manual.

3. Set your machine to a straight stitch. (I like to use a 3.0 stitch length, just slightly longer than normal.)

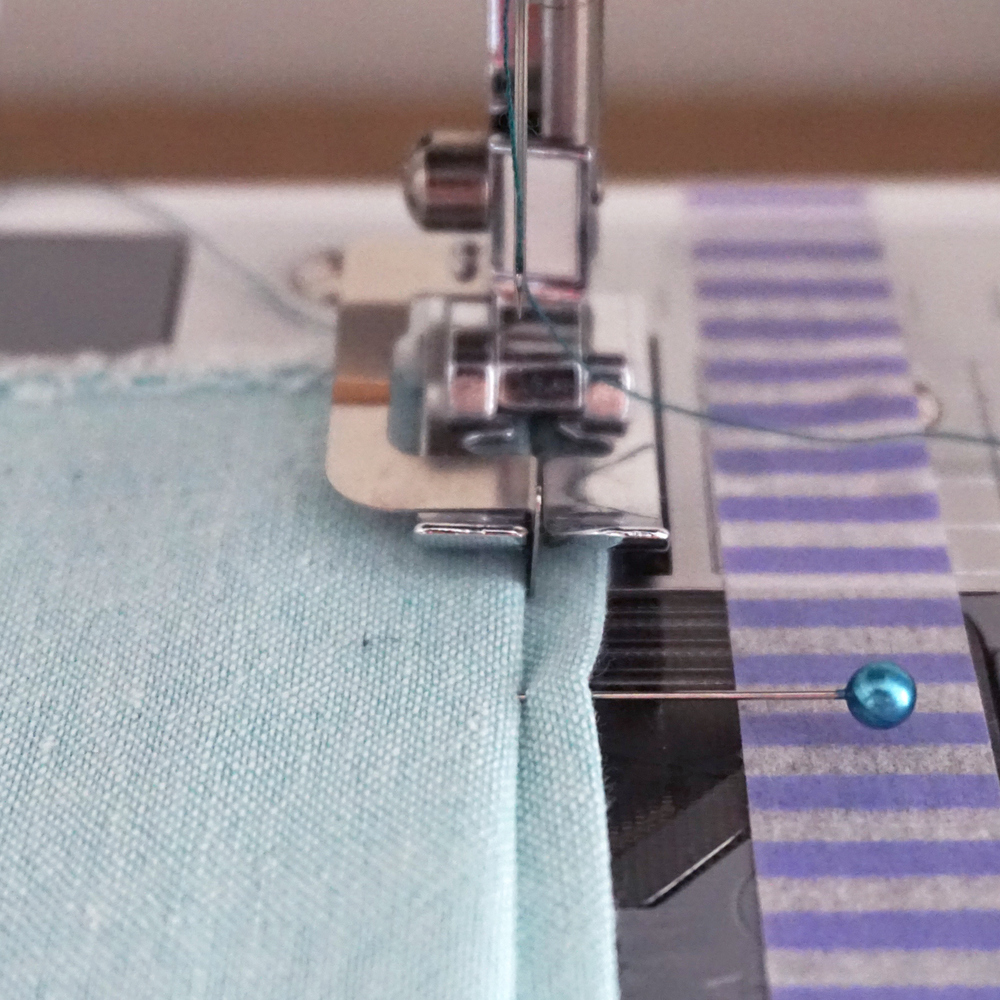
4. If you are starting at the edge of the garment, place a strip of tissue paper under the garment with a tail hanging out the back. (This will help prevent the fabric being pushed down into the machine by the needle.) Place garment under needle, lower presser foot and stitch.

How to Topstitch Knit Fabric | Sew DIY

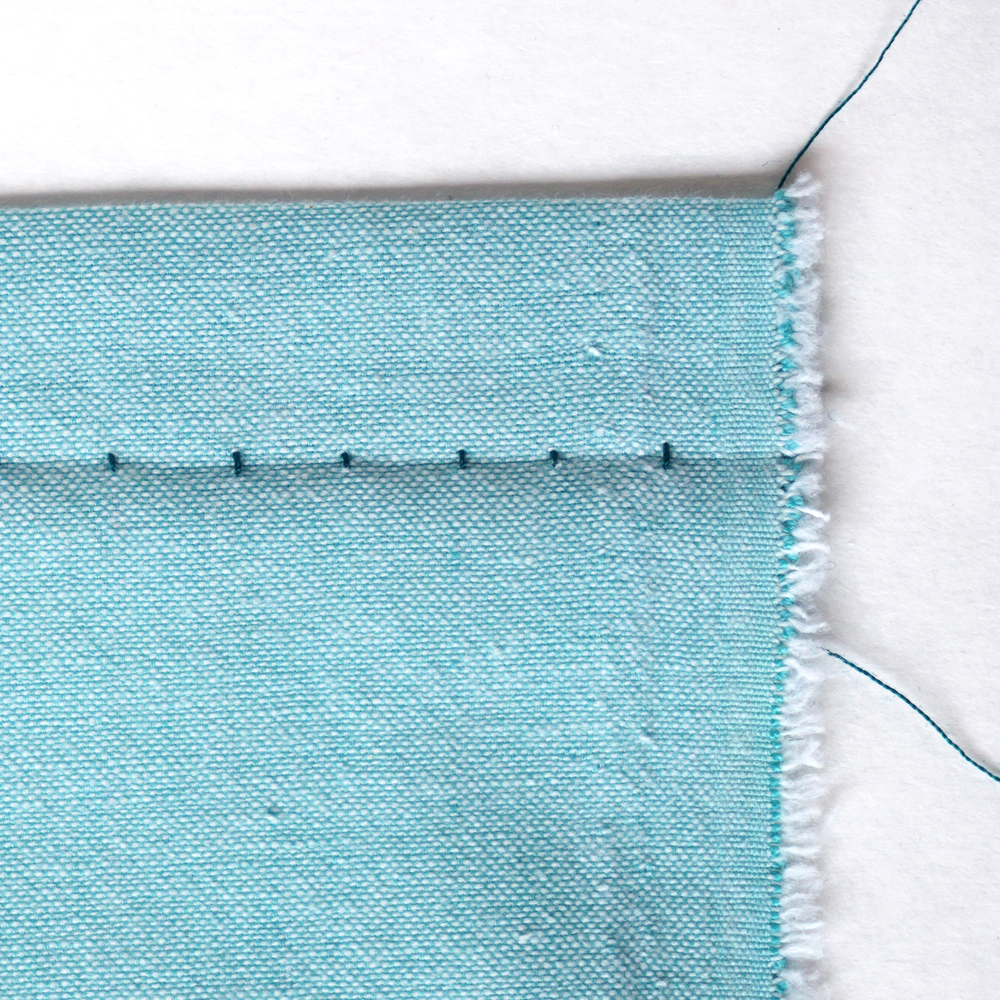
5. At end of stitching, raise presser foot, pinch garment at stitching line and pull away from the machine about 8 inches. Cut thread leaving a 4-5 inch tail. Gently pull the ends of the top threads to the wrong side and tie in a knot with bobbin thread. Trim ends. Repeat with threads at beginning of stitching. (This will secure the threads and create a clean look on the right side of the garment.)

How to Topstitch Knit Fabric | Sew DIY

I hope these tips will help you in your sewing adventures. And remember it's ok if your topstitching isn't perfect. Mine rarely is! If you want more info on sewing with knits I recommend a couple of books that have really helped me: Sew U Home Stretch by Wendy Mullin and The Colette Guide to Sewing Knits by Alyson Clair. Do you have any tips or tricks for stitching knits? Please share in the comments. Happy sewing!

DIY Polka Dot Rushcutter Dress

$
0
0
DIY Polka Dot Rushcutter Dress | Sew DIY

Today I’m very excited to share my Rushcutter dress with you. This beautiful swing dress pattern is designed by Emily from In the Folds. She contacted me at the end of last year and we decided to do a little pattern swap. She made a Lou Box Top (see hers right here) and I’m sharing this adorable dress. (BTW, aren’t sewing friends the best?) It was so fun to try out this rather ingenious and fun pattern. Read on to get all the details and see lots more pics.

DIY Polka Dot Rushcutter Dress | Sew DIY

The Rushcutter features two design styles, one with sleeves and one without. I chose to make view B, the sleeveless version. It has in-seam pockets, a pieced front yoke and button placket at the back. The whole things is done with french seams, including the pockets! I could never figure out before how you could french seam an in-seam pocket but Emily figured it out and you can see how to do it right here. She’s pretty much a genius. Make sure to check out the sewalong for lots more amazing construction tips.

DIY Polka Dot Rushcutter Dress | Sew DIY

The instructions for this pattern are really good (really, truly good, I'm not just saying that). Each step is accompanied by a clear photo and there’s plenty of detail without being overwhelming or confusing. I usually prefer illustrations to photos but I really loved the photos in this pattern. The only change I’d make for next time, is to stitch the buttonholes before attaching the back yoke to the dress.  My machine had trouble stitching the bottom buttonhole because of the lump at the french seam.

DIY Polka Dot Rushcutter Dress | Sew DIY

I cut a straight size D. According to the size chart, I’m a size E in the bust and D in the hips but since there’s a lot of ease in the pattern I decided to make the size D. I think it worked really well and it does not feel too tight at all in the bust. I considered grading down for the hips but decided against it because I thought it would mess up the swing shape of the skirt. I skipped the fabric belt for now but have played around with wearing a leather belt over the dress and I like that look too.

DIY Polka Dot Rushcutter Dress | Sew DIY

The fabric is a light weight chambray that I found at the FIDM Scholarship Store in LA. You never really know what’s going to be in their tiny shop as the selection changes daily but it’s fun to go explore. And the prices are super low. Yay! Ok, back to the fabric. The dots are printed on top of the fabric rather than being woven in. As soon as I saw it I knew I had to buy some. Chambray + Polka Dots = cut me 4 yards. The fabric was very easy to work with and it’s super fun but I do worry a little bit that it’s too juvenile.

DIY Polka Dot Rushcutter Dress | Sew DIY DIY Polka Dot Rushcutter Dress | Sew DIY

It’s been a little too cold for this kind of dress so I haven’t taken it out yet. (Do you think about your handmade clothes like that? As in the first time you wear it is kind of like a first date – getting to know each other. Do you like each other? Do you want to hang out again?) But, as soon as the temps go up I’ll be taking these dots out on the town.

DIY Polka Dot Rushcutter Dress

As you’re planning your spring and summer wardrobes, I highly recommend adding the Rushcutter Dress to the list. The shape is basic but the details in the yoke and the pockets make it really special. And if you haven’t tried french seams before this could be a fun one to start with. Thank you Emily for swapping patterns with me! 

What's Up Sew World Vol 6

$
0
0
Clockwise from top left: DIY Paper Basket  //  Riptide Sweater  // Hampshire Trousers  //  Gallery Tunic

Clockwise from top left: DIY Paper Basket  //  Riptide Sweater  // Hampshire Trousers  //  Gallery Tunic

Hello sewing friends! I hope that your new years have started off well. My freelance work has been slow and I’ve been taking advantage of it by working on a new pattern. It can be hard to stay focused when working from home and it can get rather lonely too but so far it’s going well and this week I’ve made a lot of progress. Yay! Today I’m sharing a little recap of some things happening out in the online sewing world over the past few weeks. There are so many great happenings out there. This community continues to inspire me everyday. Let me know in the comments if there’s anything I missed. Happy sewing!

PATTERN RELEASES

Sew Over It released the Tulip Skirt pattern, another great classic design.

Califaye Collection released the Hampshire Trousers (shown above).

Straight Stitch Designs released the Montlake T-shirt pattern.

Closet Case Files released a Flares extension to the Ginger Skinny Jeans pattern and a bunch of bundles for making jeans. 

Brooklyn Tweed released the Winter 2016 collection and it’s just fall down dead gorgeous. My favorite is the Riptide Turtleneck (shown above).

TIPS & TUTORIALS

Tips for trimming and grading seams from By Hand London

Tips for cutting out paper patterns from Thanks I Made It

How to Draft Box Pleats from In the Folds

How to Sew a Knit Neckline Binding from Megan Nielsen

Free Printables to Organize your Sewing Supplies from The Foldline

January is Coat Month at IndieSew and they have a great post about interfacing for coats.

An oldie but a goodie that I found on Pinterest, a guide to Schmetz sewing needles.

Wondering what to do with those strips of paper leftover from cutting your pdf patterns? Try this DIY woven paper basket from Fall for DIY (shown above).

ETCETERA

Oliver & S is hosting a Gallery Tunic and Dress Sewalong. This pattern was on my extended Quest for Dresses list and it is tempting to join the fun.

The Phoebe Sewalong is in full swing over at Colette.

I’m loving the Stash Less series from the Craft Sessions

Head over to Kollabora to find out how to become a Bernina Ambassador.

The discussion for the Colette Book Club is on Feb 15. I finished the book last week and I loved it. It’s an easy read and it’s about sewing. 

In case you missed it, I've been busy around here too:

I made two Mesa Dresses here and here.

I swapped patterns with Emily from In The Folds. It was super fun to make her Rushcutter dress and I love her version of the Lou Box Top.

This year I'm on a Quest for Dresses

How to Topstitch Knits DIY Tutorial

Fur Boot Cover Tutorial

DIY Wide Leg Pants Vogue V8836

$
0
0
DIY Wide Leg Pants Vogue V8836 | Sew DIY

I don’t make a lot of pants and I tend to wear RTW skinny jeans a lot (especially in winter). But these pants? These pants are kind of my dream pants. I just love that wide leg, fitted waist and, again, that wide leg. I do love that a wide leg is coming back into fashion. It’s such a nice contrast to the skinnies. It’s really comfortable and has a great sense of drama. I’m really tall so I feel like this is an easier style for me to wear.

DIY Wide Leg Pants Vogue V8836

I think I bought this pattern (Vogue V8836) pretty much as soon as I saw it. I’ve had this vision of wide leg sailor pants in my head for a while this pattern is very close to it. (Of course, now there’s Vogue V1464 to fulfill the button front sailor pant dream. Could 2016 be the year of the pant? Perhaps.) This pattern is in the “Very Easy Vogue” category and I’ve often found the moniker to be quite true. Indeed, these pants were very easy to make. I think the most difficult part is the topstitching (which I sneak peeked on instagram here). I tried to do a triple straight stitch around the fly because I like the look of it but it was too hard to keep it straight around the curve. After a few tries I gave up and did a single straight stitch. If I make these again, I might opt for a decorative topstitching thread.

DIY Wide Leg Pants Vogue V8836 | Sew DIY

I cut these pants out months ago so I don’t remember my plans when I chose to cut a size 16. My measurements are right between a 14 and 16 so perhaps I just didn’t want to cut it too small and figured I could make adjustments. In retrospect, I probably should have just cut a size 14 because there was plenty of ease. The finished garment measurements are printed on the tissue pattern which is kind of a pain to find. I'd love it if they were printed on the envelope. 

DIY Wide Leg Pants Vogue V8836 | Sew DIY DIY Wide Leg Pants Vogue V8836 | Sew DIY DIY Wide Leg Pants Vogue V8836 | Sew DIY

I ended up making the front pleats largely and increasing the seam allowance at the sides and center back. In total I probably removed 4 to 5 inches. (I thought I took notes but can’t find them. whoops!) I’m pretty happy with the fit now except I think I maybe needed to remove a little more length from the waistband. It fits the pants but seems to gap a little bit. I also lengthened the crotch depth a little bit but I didn’t have enough fabric to length the leg.

DIY Wide Leg Pants Vogue V8836 | Sew DIY

The fabric is Robert Kaufmann Essex Yarn Dyed fabric in Denim. It was really easy to work and is so, so gorgeous. I actually bought it during a Black Friday sale in 2014. I think I had planned to make pants with it but I only bought 2.5 yards so I just barely had enough for these pants. The pattern calls for 2 5/8 yards but I was able to squeeze it in. There was one flaw in the fabric (a rather large thread in the weave, so annoying!) that I carelessly placed at the center front. But I was lucky enough that it got folded up into the pleat. Phew! 

DIY Wide Leg Pants Vogue V8836 | Sew DIY

I'm afraid I have not taken these pants out yet but I'm hoping that I'll get a lot of wear out of them. I think I could even wear them in summer without being too hot because the wide leg will allow for a lot of air movement. Have you tried this pattern? What do you think of the wide leg trend?

How to Machine Blind Hem Stitch - DIY Tutorial

$
0
0
How to Sew a Blind Hem Stitch by Machine | Sew DIY

I first learned the machine blind hem stitch in my high school sewing class. It’s a really useful to stitch to know and very easy to do. The stitch simulates a hand done blind hem stitch by stitching a few straight stitches in the hem and then one zig zag to catch the body of the garment. I most often use it to hem pants or skirts. It's super fast to do and a great stitch to have in your arsenal of techniques. 

It must be said that it’s not as invisible as a hand-sewn blind hem stitch but it’s faster and depending on the fabric and thread color it’s usually very hard to see. As always, if you’re unsure that you’ll like the finish, test it out on scrap of fabric. You can even try different colors of thread to see which is the most invisible. And remember even if you can see the stitch a little bit, it’s unlikely that anyone else will notice. The trickiest part of sewing this seam is prepping the fabric. It feels a little counterintuitive but after you’ve done it once or twice, it will make sense.

How to Sew a Blind Hem Stitch by Machine | Sew DIY

HOW TO SEW A MACHINE BLIND HEM STITCH

Step 1: Set up the machine for Blind Hem Stitch and attach blind hem presser foot if available. On my machine (a Brother CS6000i), it’s stitch number 09. It makes about 5 straight stitches and then does one zig zag to the left. (If your machine doesn’t have a special presser foot don’t worry about it. I learned without one.)

How to sew a blind hem stitch by machine | Sew DIY

Step 2: Fold the hem of the fabric towards the wrong side two times and press. To hold it in place, insert pins with the point sticking out towards the bottom and the head in towards the top of the garment (the opposite of how you’d normally do it).

How to Sew a Blind Hem Stitch by Machine | Sew DIY How to Machine Blind Hem Stitch | Sew DIY

Step 3: Fold hem towards right side so that the heads of the pins are now on the right and there is a fold in the garment just to the left of the hem fold. Position the fabric under the presser foot with the garment fold touching the guard in the middle and the hem fold sticking out to the right. (If you don’t have a special foot just use the regular one and keep the fabric folded as you stitch.)

How to Sew a Blind Hem Stitch by Machine | Sew DIY

Step 4: Slowly start to stitch. The straight stitch should go into the hem fold and after about 4 stitches the zig zag will go to the left and make one stitch in the garment fold. The trick is to keep it positioned so that the zig zag gets just a little bit of garment but not too much. The more it catches the more visible it will be on the outside. (The straight stitch will only be visible on the wrong side.)

If you miss a section of the garment you can go back later and stitch again by machine or by hand. But if you miss just one zig zag the hem will probably stay up fine without additional stitching.

How to Sew a Blind Hem Stitch by Machine | Sew DIY

Et voila! Here's the right side of the garment. Here I'm using a dark thread so that you can see the stitching but if your thread matches the fabric then you won't be able to see the stitching that much (see below). 

How to Sew a Blind Hem Stitch by Machine | Sew DIY

This is the hem of these pants. Here I used a white thread and you can see it if you look really closely but from a distance it's invisible. Yay! Let me know if you have any questions. I hope that you find this useful. Happy sewing!

DIY Sequin Mesa Dress

$
0
0
DIY Sequin Mesa Dress | Sew DIY

I originally conceived the idea for this dress back in December when I was preparing for the holiday party season. I was planning to go all out with sequins! and fur! and it was going to be super glam and totally fabulous. Well, the chore of sewing sequins and fur got the best of me and I had to postpone the sequins. So now I have a super shiny, sparkly Valentine’s Day dress (or shall I say Galentine’s Day? cause really that’s way more fun, amiright?).

DIY Sequin Mesa Dress | Sew DIY

This dress is actually my first version made with the Mesa dress pattern from Seamwork Magazine. I made a muslin around the end of the November to test the fit and discovered that the neckline was a little wide and that I should go down a size. (Details on fitting here.) I love the simple silhouette of this knit dress and that it has sleeves. This elbow length is just divine. I've since made two Mesa dresses blogged here and here.

For this dress, I made the adjustments to the flat pattern and started by cutting out the lining fabric. I stitched the lining together and tried it on. The fit looked great so I moved on to the sequins. (By the way, testing the fit of a pattern with your lining can be a great cheaters way of doing a quick muslin.)

DIY Sequin Mesa Dress | Sew DIY

For the fabric, I ventured to the downtown LA fabric district (I’m very lucky to live only minutes away). I browsed around Michael Levine and didn’t see exactly what I wanted. I had an image in my mind of exactly what I wanted so I decided to keep looking and explore some of the many smaller shops nearby. Just a few doors down the street, I found faux fur (see my fur projects here and here) and sequins that were exactly what I had envisioned. The store was crowded but I managed to grab a salesperson and get my fabric quickly. I can’t remember exactly how much I paid or even how much I bought (2 yards?) but I’m pretty sure it was around $30 for the fur and sequins. I still have sequin fabric leftover and I’d love to do an appliqué sweatshirt with it.

DIY Sequin Mesa Dress | Sew DIY

The sequin fabric is a stretch mesh fabric with the sequins sewn on in a serpentine pattern. The mesh is a little bit see through so I headed across the street to the Michael Levine Loft store. I never know what I’ll find there but I got lucky and found a light weight stretch knit in a neutral pink/beige. It’s a perfect lining fabric for this dress. It provides the stretch needed, is soft against the skin and doesn’t show through the fabric.

DIY Sequin Mesa Dress | Sew DIY

To sew the lining to the sequin fabric, I first sewed both at the shoulders, sleeves and side seams. Then I pinned the lining to the dress right sides together at the neckline and stitched around the neck opening. Then I turned it right side out and voila! a lined dress. I tacked the seam allowances at the sleeve caps together to keep it more stable. By the way, I used a serger for the lining and my conventional machine for the sequins. Do not use the serger for your sequins, I’ve read that it can damage the blade.

DIY Sequin Mesa Dress | Sew DIY

The last step was to hem the sleeves and skirt. Lots of articles recommend removing sequins from the seam allowance. I didn’t bother at the side seams but for the hems I thought it would be best. It would cut down on sequins that could scratch the skin and the lining fabric. So I went at it with my seam ripper gently removing sequins from the seam allowance. And about 4 hours later I realized that it was going to take FOREVER and I was not at all close to being done. And there were sequins everywhere. In the couch, in my pockets, down the hall of my apartment building (oops!). In the end, I got a little less gentle with the seam ripper and I did create a few small holes in the fabric. Oh well. I stitched the lining to the hem by hand and it’s done! The itchiness from the sequins is not totally gone (my forearms still touch the sequins) but I am glad that I took the time to remove the extra sequins.

DIY Sequin Mesa Dress | Sew DIY

Wearing this dress out to take pictures made me feel pretty self conscious. It was just a regular Sunday afternoon. haha! It’s so sparkly that in the car the sunlight would reflect on the sparkles and flash little bits of light all over the car. Rather distracting. I had to cover up with a coat! But, if I ever get a gig as a game show hostess I will be ready to go. Perhaps I should start planning now for this year’s New Year’s Eve party, just to make sure I have somewhere to wear this sparkly beauty.

10 Trousers Sewing Patterns for Spring

$
0
0
10 Trousers Sewing Patterns for Spring | Sew DIY

I've been sewing more and more pants over the last couple of years. I started off last year with the Hudson Pants and this year I've moved on to more fitted pants. I shared Vogue V8836 last week and I have more planned. In the summer months, I tend to wear lots of dresses and skirts but once the temperatures dip, I need to stay a little bit warmer and pants are an easy solution. As we head into Spring, here are a few of the patterns that I have my eye on. 

10 Trousers Sewing Patterns for Spring

1. Simplicity 8058

2. StyleArc Ebony Woven Pants

3. Vogue V1464

4. McCall's M7098

5. Moji Pants by Seamwork

6. Wyome Boyfriend Jeans by Named Clothing

7. Wanda Pants by Schnittchen

8. Birkin Flares by Baste & Gather

9. Alexandria Peg Trousers by Named Clothing

10. Hampshire Trousers by Califaye Collection 

Do you have a favorite pants pattern? Or something you're planning to make this year?


Call for Pattern Testers

$
0
0
Call for Pattern Testers | Sew DIY

This year has been a very productive one for me. I’ve been working away on a new pattern and it’s now ready for testing. Yay!!! The new pattern, called the Nita Wrap Skirt, comes in three lengths with three different waistband finishes. Unlike my other patterns, this skirt is fitted at the waist and hips so it’s important to pay attention to measurements. However, it’s still simple to construct so you can easily whip one up in a weekend. 

I’m looking for testers with a range of skill levels and sizes (hip size 33 inches to 50 inches). I’m not able to provide monetary compensation for the testing but you will receive a final copy of the pattern and my undying gratitude. If this sounds like something you’re interested in, you can sign up to be a tester right here. The pattern will be sent out the week of February 22, 2016 and feedback is due March 8, giving you about two weeks to sew a sample, take photos and send some feedback. 

12 DIY's for Galentine's Day

$
0
0
12 DIY's for Galentine's Day | Sew DIY

The traditional, gushy romantic love of Valentine's Day is great and all but Galentine's Day is something I can really get behind. I love the idea of taking a day to celebrate all the amazing people that we count on throughout the year. So today, here are twelve DIY's for little gifts to make for all the gals in your life. 

12 DIY's for Galentine's Day

1. Friendship Bracelets

2. Printable Valentine's Stickers

3. Conversation Heart Rings

4. Cat Valentine's

5. Iron On Treat Bags

6. Canvas Print Clutch

7. Sequin Heart Treat Bag

8. Arrow Heart Hair Pin

9. Finger Knit Fabric Statement Necklace

10. Woven Danish Heart Pouch

11. Printable Tattoos

12. Watercolor Treat Bags

And if you're not in the mood to DIY, check out these completely adorable Sweetheart Conversation Tacos. And if you're looking for more inspiration, follow me on Pinterest. Happy Galentine's Day Darlings!

What's Up Sew World Vol. 7

$
0
0
Clockwise from top left: Almada Kimono  //  Wanda Trench Coat  //  Opal Cardigan //  French Dart Shift

Clockwise from top left: Almada Kimono  //  Wanda Trench Coat  //  Opal Cardigan //  French Dart Shift

The past couple of weeks have been busy working on my new pattern, doing my regular job, sewing bunch (lots of new stuff coming later this month!) and for the past few days battling a flu-ish cold. I've been going to bed early and dreaming about the Almada Kimono. Of course, it must be in double gauze, because it's just the most luxurious yet casual fabric. The Almada is from Seamwork magazine and last week, I had the honor of being featured on the Colette blog sharing some thoughts about my handmade wardrobe. It's part of a new series called Seamworker's Closet and I'm sure there are going to be lots of great things to come. 

PATTERN RELEASES

Megan Nielsen released the Rie dress pattern. It's a dress/top and suitable for maternity.

Marilla Walker released the Rose Jacket pattern and it’s free!

Paprika Patterns released the Opal Cardigan.

Maven Patterns released the French Dart Shift pattern.

Wear My Lemonade has a new pattern, the Wanda trench coat. So gorgeous. I wish it was in English too.

Grainline Studio released an add-on to the Archer shirt pattern for a Popover style. I bought the Archer pattern at the end of last year and now I want to make it even more.

And last but not least, By Hand London released the Sarah Shirt pattern just last night. 

TIPS & TUTORIALS, ETC

IndieSew announced a new series called My Handmade Month that explores building a wardrobe that you love by evaluating what she wears every month. I can’t wait to see what it’s in store. And you can join in with #myhandmademonth on social media.

There’s a new issue of Seamwork Magazine out and it focuses on intimates. I especially love the kimono pattern Almada

The Fold Line has a great series called The Pattern Tutorials that helps you understand how to read and use a sewing pattern. Check out part 1, 2 and 3.

Ten Tips for Pressing your Sewing from Tilly and the Buttons

How to Applique with Melly Sews

Tips for Turning Holes from Straight Grain

Join the 2016 Vintage Pledge with A Stitching Odyssey

Tips for raising a raglan neckline from the Makery

Simple Simon and Co is hosting “Love your sewing space” for the month of February

Learn how to Colorblock your Archer at Grainline Studio

Learn how to Make a Bow Tie with this tutorial from Grainline Studio

In case you missed it:
I was interviewed by Seamwork Mag about my handmade wardrobe.
I made a Sequin Mesa Dress!
And, I shared a tutorial for How to Sew a Blind Hem stitch by machine.

What's been happening in your sewing world? Let me know in the comments.

DIY Improvised Blue Scrap Quilt

$
0
0
DIY Improvised Blue Scrap Quilt

I used to imagine that quilting was the perfect craft for me. After all, I love sewing and graphic design and quilting seems like the perfect combination of the two. I even took a quilting class about 10 years ago. It was a great way to get started and learn the basics. I also love that quilting can use little bits of fabric that might otherwise be thrown away. And over the years I've saved a lot of fabric with that purpose in mind. And now finally I've used some of those fabric scraps!

DIY Improvised Blue Scrap Quilt | Sew DIY

A year or more ago, I organized the scraps into color groups blues, black, white, prints, etc. And a year ago I started making a quilt with the blue fabrics. My method was completely improvised. I just picked up a piece of fabric found another that was a similar size and stitch them together. I'd then keep adding pieces in a row, occasionally stopping to press or trim. I created a bunch of "blocks" and somehow formed them into a quilt top. I took my larger scraps and formed those into a quilt backing. Then I stuck the whole thing in the closet for a year.

DIY Improvised Blue Scrap Quilt | Sew DIY

And around the beginning of this year I decided it was time to finish the blasted thing. So I pulled it out of the closet, gave it a good pressing, sandwiched the layers, pinned it together and started quilting. Like the piecing, I went with an improvisational method of quilting. I started out mostly stitching near a seam line but then got a little more creative (and had more fun) stitching overlapping zig zag patterns. My stitching is not even or straight but that's ok. Heck! I finally used up those scraps!!! And now I have a cozy quilt to keep me warm! Or just point to and say, Yeah, I made that.

DIY Improvised Blue Scrap Quilt | Sew DIY

The big thing I learned about quilting (this is the biggest one I've done) is that it's hard on the body. In garment sewing, there's a lot more moving about. Stitch a seam. Press it. Pin another seam. Stitch it. I usually try to do as many seams as possible before moving to the ironing board but boy I never realized how much my neck and back could hurt from just sitting at the machine.

In the future, if I have a more precious quilt I will definitely look into having someone do long arm quilting for me. For this project, I just used my regular machine fitted with a walking foot and an extension table.

DIY Improvised Blue Scrap Quilt | Sew DIY

Yesterday I stopped by Quiltcon West to see the exhibits. I unexpectedly had the day off work and the convention was very close to where I live so I just popped over for a couple of hours and I’m so glad that I did. I started by going to the exhibition hall and I was almost immediately overwhelmed by the abundance of amazing quilts. It was so inspiring that I’m almost at a loss for words. It made me want to continue making quilts and experimenting. Of course, I will continue to make garments but there’s a time and place for quilts too. I’m pretty confident in my piecing skills but my quilting needs a little practice. Or the help of a long arm quilter. :)

I still have a bin in the closet with about five different quilts to be made or completed. I hope that the success of this project will help inspire to actually finish some of those. I have a quilt top I made about 10 years ago when I took that class that just needs a backing, quilting and binding. I bought batting for it last weekend. So. Baby steps. Next up the back! Maybe in another year I'll have one more quilt finished.

DIY Improvised Blue Scrap Quilt | Sew DIY

Via an article on Kollabora I stumbled upon this program for donating small quilts to animal shelters. I really love this idea. I'm adopting a kitten soon so I'm animals are particularly on my mind. I'd love to be able to use my skills to help out and also use some supplies that I have just sitting around. Have you ever sewn for charity?

Indiesew Spring Collection 2016

$
0
0
Indiesew Spring Collection 2016

It's that time again! Time for another the Indiesew Spring Collection. Indiesew is a really cool website that sells digital sewing patterns from a range of designers (including me) and a small range of fabric too. Every season they create a bundle of patterns at a discounted price. I'm really excited because the Lou Box Top is part of the Spring 2016 collection and it is in great company. This collection is full of great wardrobe builders that will outfit you for months to come. In addition to the top, you'll get jeans, a romper, a dress and kimono. Just think of the possibilities!!

Indiesew Spring Collection 2016

In case you're not already familiar, the Lou Box Top is a really versatile and easy to wear top. It comes with two neckline options and three hem options. It's super fast to sew and has instructions for both knit and woven fabrics. I'm absolutely in love with the photos for this collection. You can see a knit version of the Lou Box Top in action in the photos for the Birkin Flares too. Check out all the photos (and links to fabric!) here

Indiesew Spring Collection 2016

The full bundle includes the Lou Box Top, Birkin Flares, Sanibel Dress/Romper, the Rushcutter Dress and the Florence Kimono for $43. The mini bundle includes the Lou Box Top, the Rushcutter Dress and the Florence Kimono for $27. And if you're pdf averse, there is also a very limited run of printed patterns available. So, head over and check it out.  

Indiesew Spring Collection 2016

There's a blog tour to show off all the amazing ways you can use these patterns and next week I'll be posting my versions of the Birkin Flares, Sanibel Dress and a new variation of the Lou Box Top. Phew! I've been busy. :) I've already made the Rushcutter Dress and you can see my photos here. I love trying out new patterns by different designers. I always learn so much whether it be new-to-me techniques or how to handle a particular fabric. This is an amazing collection and it has me dreaming about sandal weather. I feel like I can handle any heat when I have such cute clothes to wear. So, without further ado, go get yourself a bundle and start stitching!

Birkin Flares – Indiesew Spring Collection Blog Tour

$
0
0
DIY Jeans with the Birkin Flares sewing pattern | Sew DIY

I used to have this idea in my head that jeans were just too hard, too time consuming and I did not need to venture into that realm of DIY fashion. And then Lauren of Baste and Gather released the Birkin Flares and I started to think, why not? Why not give myself a little challenge. I can make simple tank tops all day and yes they'll be worn to death but why not venture outside my comfort zone? So, when Indiesew invited me to participate in the blog tour for the Spring Collection I decided there was no time like the present to get started.

DIY Jeans with the Birkin Flares sewing pattern | Sew DIY

For most projects I can find everything I need in my stash but jeans require a few things that I didn't already have. I started out by going to the downtown LA fashion district and picking up some denim. As it is my first pair of jeans, I didn't want to use an expensive fabric yet. The pattern is designed with negative ease so I needed to find a denim with stretch. I went to one of my favorite little fabric stores, Alex Fabrics on 9th and found two great pieces of denim. This is my go-to store for zippers and fabrics are around $5 a yard. For my first pair of Birkins, I went with a classic dark blue. I found a couple of zippers at Alex then explored some other shops on Maple and picked up a few more.

DIY Jeans with the Birkin Flares sewing pattern | Sew DIY

Next in the supply hunt, I ordered topstitching thread, rivets and buttons from Taylor Tailor. His shop specializes in jeans supplies so you should definitely check it out if you're making jeans. I did look for these supplies downtown but couldn't easily find what I wanted. My order came really quickly and the spools of topstitching thread are quite large so I still have plenty leftover.  When I made this denim dress, I used a small spool of Gutermann topstitching thread. It was great thread but I ran out and had to buy an additional spool part way through. For this pair of jeans, I used yellow for most of the topstitching and red as an accent for the bar tacks.

DIY Jeans with the Birkin Flares sewing pattern | Sew DIY

There are a ton of fabulous examples of this pattern on the interwebs, just take a look at #birkinflares on Instagram. So, I was pretty confident that the fit was going to be great. I cut a straight size 29 and did not add any length. The pattern comes with a 34 inch inseam which is perfect for me with a 1 or 2 inch heel. I think I'd actually like to make another pair that's longer to wear with some other higher shoes. I really like the fit of these jeans, they sit a few inches below my natural waist just under my belly button. They do a great job of covering that poochy belly part but I'm still a little tempted to try another version with a higher rise. Cause I'm crazy. And I just have a thing for super high rise jeans. Let's bring back the 70s y'all!

I've also considered narrowing the leg at the lower thigh just above the knee. Being accustomed to the tight skinny jean silhouette, I wanted it to be tight through the whole thigh. But after looking at other versions of these and more episodes of Gilmore Girls than I'm willing to admit, I noticed that this style is usually not tight on the lower thigh. I do think it would create more dramatic silhouette so I might try basting it just to see.

DIY Jeans with the Birkin Flares sewing pattern | Sew DIY

Making these jeans took a long time. As in days. I'm a sucker for quick projects so it took some patience on my part to just stick with it and keep going. There are a lot of steps but the instructions are fabulous. I really appreciated the detail put into them. Usually I'm a little annoyed if there are too many steps but jeans require some specific things so this time I liked it. Specifically, when to topstitch, when and where to serge. Reminders to change your stitch length and thread, etc. So helpful to have that all detailed. It would be really convenient to have two machines set up, one with topstitching thread and the other with regular. I felt like I spent a lot of time switching back and forth.

DIY Jeans with the Birkin Flares sewing pattern | Sew DIY

I'm pretty satisfied with my topstitching. There are a few wonky places but I don't think anyone will notice unless they look super close. I do recommend switching to a slower stitch speed when doing the topstitching. For me, it helped keep the stitches even. I do suspect that if I had a fancier (more expensive) machine that my stitches would be even better but for now these'll do just fine. I struggled a little bit getting the curve around the fly and re-did it three or four times. Anyone have tips for stitching a nice smooth curve?

I think the hardest/scariest part for me was the rivets. The jeans button went in fine but oh my the rivets. I watched Lauren's video and read articles and practiced. And my test samples were not great. I just had the hardest time finding the right surface. I ended up using the flat end of a barbell and my rivets are a little bit smushed but no one's going to notice. They're not that bad. I did add spacers to the back rather than trying to trim the posts. I also want to mention removing the zipper teeth. I really struggled to pull them off until I discovered that if I grab the tooth with the fat part of the pliers, it worked right away. Trying to use the narrow "needle" end of the pliers did nothing. But the wider part near the hinge worked perfectly.

DIY Jeans with the Birkin Flares sewing pattern | Sew DIY DIY Jeans with the Birkin Flares sewing pattern | Sew DIY

All in all, I'm really, really happy with how these turned out. I've worn these jeans a lot since I finished them and I'm very happy with the fit and how the denim has held up and not stretched out. I've actually worn this exact outfit about once a week since I finished them. I also love that the design of the pants is not what everyone else is wearing all the time. Flares are definitely back in style but they're also definitely not as popular as skinnies still are. I will likely be making jeans again, maybe skinnies next time! I have some gray denim that I'd love to have as skinnies. It's a lot of work to make jeans so I'm taking a little "break" and playing with easy patterns. Like the top pictured here! It just so happens to be my pattern, the Lou Box Top. I'll be posting more about this zipper back variation later this week so stay tuned.

Indiesew Spring Collection 2016 Blog Tour

For now, head over to Indiesew to pick up the Spring Collection bundle which includes both the Lou Box Top and Birkin Flares, plus the Sanibel Romper (see mine here), the Rushcutter Dress (see mine here) and The Florence Kimono. It's an awesome collection of patterns that are truly wardrobe builders. Also make sure to check out the rest of the blog tour for some amazing sewing inspiration.

February 24: Fleurine | Sew Marie Fleur
February 25: Teresa | Dandelion Drift
February 26: Lauren | Right Sides Together
February 29: Erin | Sewbon
March 1: Beth | Sew DIY
March 2: Emily | In the Folds
March 3: Caroline | Sew Caroline
March 4: Lauren | Baste + Gather
March 5: Sophie | Ada Spragg

Disclosure: I received this pattern for free but all thoughts/opinions are my own.

Sanibel Dress – Indiesew Spring Collection

$
0
0
Sanibel Dress ? Indiesew Spring Collection Blog Tour

Late last year I began a quest for dresses. I found myself hating everything I owned and set about looking for patterns that could fill the void. (Read about the quest here.) So when I was asked to participate in the Indiesew Spring Collection blog tour I knew I had to try out the Sanibel Dress by Hey June. I love all the details and trust me it was a challenge deciding which view to make. It's a classic shirt dress design with a button front, collar and drawstring waist. There are options for sleeves with button plackets or epaulets and button tabs. You can also choose whether to do a skirt or shorts on bottom, both come with scooped front pockets. After much debate, I decided to do the skirt with epaulets.

Sanibel Dress ? Indiesew Spring Collection Blog Tour

I actually printed out the entire pattern, rather than just the pages I needed so that I can make it again but with long sleeves and shorts. I really love the chambray version featured in the IndieSew collection and I can easily imagine wearing it all summer. It would also give me more practice sewing sleeve plackets and a chambray would be easier to topstitch.

Sanibel Dress ? Indiesew Spring Collection Blog Tour Sanibel Dress ? Indiesew Spring Collection Blog Tour

I found this fabric at the FIDM Scholarship Store in downtown LA.  They have a very small fabric section but I've always managed to find some gems. And it's really affordable, around $3 or less per yard. The fabric is some sort of rayon/poly. It's comfortable to wear but it was not the easiest to sew, especially all topstitching for the details such as the epaulets and pockets. Fortunately the fabric is very busy so you can't see my wonky stitching. I really did my best to cut everything properly but I'm sure I cut some things off grain. But again, you can't tell. I've ordered a bottle of spray starch to try out for my next project. I hate feeling scared to do something and I'm really scared to cut into some fabric I've had sitting around since last fall.

Sanibel Dress ? Indiesew Spring Collection Blog Tour

I'm super in love with the buttons I used for this dress. As I've mentioned on Instagram a number of times, I have a massive button collection. So I just shop my stash rather than the store. I explored the gray button box and found a few viable options but my favorite was the sundial style. However, I only had six sundial buttons and the pattern calls for seven. I asked for advice on IG and decided to just not attach a button at the top of the bodice. I never button my shirts all the way to the top and as someone wisely pointed out, with how the collar lays, you'll rarely see the top button.

Sanibel Dress ? Indiesew Spring Collection Blog Tour

The only change I made to the pattern was to lengthen the skirt about 4-5 (?) inches. Otherwise, I cut a straight size M. There is a lot of ease built into the pattern and the drawstring waistband is fairly forgiving so I felt comfortable going down a size at the bust. My measurements are roughly 38/28/39 and 5'11" (hence the added length). The bodice is actually pretty long and I believe it's designed to be cinched up by the drawstring to create a blouson effect. I did not add any length there and if you are short I recommend checking the length and possibly shortening it. For the drawstring, I just used a length of twill tape and skipped the elastic, self fabric drawstring the the pattern instructs. I like that it gives a contrast look and it saves some time too.

Sanibel Dress ? Indiesew Spring Collection Blog Tour

Depending on the buttons I want to use, I might make the button band wider the next time I make it. It's pretty narrow and some of my buttonholes are noticeably off center. The great thing about the extra busy print is that it distracts from any imperfections in my sewing. yay! I also might make the collar stand a little shorter and make the casing longer. 

Overall, I really like this pattern and I'm looking forward to trying it out with an easier to sew fabric. And of course the romper version. I'd also love it in rayon challis with long pants. I wore this dress to work last week and I felt really comfortable yet still put together, exactly how I want every outfit to be. This pattern is a really great wardrobe builder just like all the patterns in the Indiesew Spring Collection. Scroll down to take a gander at the rest of the collection and get the calendar for the blog tour.

Indiesew Spring Collection 2016

The Indiesew Spring Collection is an amazing collection of five patterns, the Birkin Flares (see mine here), Lou Box Top, Florence Kimono, Rushcutter Dress (see mine here) and the Sanibel Romper/Dress. I'm so honored to have my pattern as part of the group. It's a great collection of wardrobe building patterns that will keep you in DIY style for months to come. And when you buy the bundle you save money which means more money for fabric, right? :)

Indiesew Spring Collection 2016 Blog Tour

Make sure to check out the rest of the blog tour posts for more sewing inspiration. It's only half way through and there's already so much eye candy! 

February 24: Fleurine | Sew Marie Fleur
February 25: Teresa | Dandelion Drift
February 26: Lauren | Right Sides Together
February 29: Erin | Sewbon
March 1: Beth | Sew DIY
March 2: Emily | In the Folds
March 3: Caroline | Sew Caroline
March 4: Lauren | Baste + Gather
March 5: Sophie | Ada Spragg

Disclosure: I received this pattern for free but all thoughts and opinions are my own.


What's Up Sew World Vol 8

$
0
0
Clockwise from top left: Kenedy Dress from Seamwork  //  Nicole Jacket from Republique du Chiffon  //  Moana Dress and Starboard Jeans from Papercut  //  Wedgewood Skirt from Straight Stitch Designs

Clockwise from top left: Kenedy Dress from Seamwork  //  Nicole Jacket from Republique du Chiffon  //  Moana Dress and Starboard Jeans from Papercut  //  Wedgewood Skirt from Straight Stitch Designs

It's been another busy few weeks. In addition to working full time, I've sent my new pattern out for testing (there are a lot of amazeballs tester photos on instagram #nitawrapskirt), adopted a kitten, done the Indiesew blog tour (here and here), joined MIY March and I'm sewing every chance I can get. Phew! The kitten is definitely the biggest life change. I never would have classified myself as a cat person but this little guy is so adorable and fun. I'm totally in love with him, even when he's waking me up at 5am to play or jumping into my photos. I also applied to be a Bernina Ambassador over on Kollabora. I'd super appreciate it if you vote for me by liking my project. (thank you in advance!)


PATTERN RELEASES

Republique du Chiffon release the Nicole Jacket. It's currently available in French and English translation is in progress.

I love this vintage Simplicity reprint for a three armhole dress. Check it out. Simplicity 8049

Sew Over It released the Susie Blouse pattern

Tilly and The Buttons released the Dominique skirt, a super simple gathered waist in two design styles. 

Straight Stitch Designs released the Wedgewood Skirt. It's a classic pleated skirt with exposed back zip and super cool pockets.

Papercut Patterns released a new collection called Ahoy!. I really love this outfit combo of Moana Top and Starboard Jeans.

Tessuti released the Jane Dress pattern. It's a lovely basic shape with a super cool side seam vent, just the kind of dress that I imagine being worn over and over.

There's a new issue of Seamwork Magazine out and it has two beautiful dress patterns, the Catarina and the Kenedy.

From Style Arc I'm loving the Mila Dress and the Beth Pant (because duh.). 


TUTORIALS, ETC.

This giant bobble sheep pillow by Purl Soho is ridiculously cute and free!

Wendy Ward is hosting MIY March on Instagram. I've been joining along and I love the daily challenge/inspiration. Plus it's a great way to meet more online sewists.

Also from Wendy Ward, some basics on bias.

I love these DIY fabric coasters from Passion Shake and it has me thinking about making weavings into coasters. 

How to Sew a Fabric Wallet from Mollie Makes

Two projects from Minted to use up your scraps of pretty fabric by making a Fabric Covered Serving Tray or Fabric Covered Party Hats.

Tips for sewing with slippery fabrics from By Hand London

A guide to fabric shopping online from See Kate Sew

Let me know in the comments if there's anything I missed. Happy sewing!!

How to Hand Stitch Knit Fabric

$
0
0
How to Hand Stitch Knit Fabric | Sew DIY

This is just a quick little post today about hand stitching! So we know from my topstitching knits tutorial a few weeks ago, that when you're sewing with knits it's very important to use stitches that stretch. It's pretty rare that you'll need to hand stitch a knit fabric as they're a more casual fabric. But on that occasion, you'll need to choose the correct kind of stitch to suit the fabric.

When I made my Sequin Mesa dress, I used a stretch sequin fabric and lining. Because I didn't want any topstitching to show, I used a hand stitch to secure the hem and attach the lining at the sleeve and skirt hems. At the sleeve hems, I wasn't really thinking and just used a regular slip stitch which means that seam does not stretch very much. I just wasn't really thinking at the time. But, when I went to sew the skirt hem, I realized that it would be best to use the fagotting stitch. I had done this stitch before but it felt really tedious. This time, I figured it out and it was quick and easy to stitch.

How to Hand Stitch Knit Fabric | Sew DIY

How to Hand Stitch Knit Fabric

Important note: You will be working from left to right for this stitch.

1. Secure your thread to the fabric. Then insert the needle from right to left through a few threads of the garment.

2. Moving to the right, insert the thread again from right to left through a few threads of the hem. Loosely pull the thread but don't tighten it all the way. It should be tight enough that the stitching is secure and the thread won't get caught on anything. But not so tight that it warps the fabric or doesn't allow it to stretch.

3. Repeat steps 1 and 2 until the entire hem is secure.

And that's it. This is a helpful stitch to know and easy to sew once you get the rhythm down. It can also be used to join two pieces of fabric in a decorative way, as seen here on the Colette blog. Are there any other sewing tips or tutorials you'd like to see on the blog? Let me know in the comments.

DIY Zip Back Lou Box Top Variation

$
0
0
DIY Zip Back Lou Box Top Variation | Sew DIY

Hello lovelies! Today I have yet another variation of the Lou Box Top to share with you. This version is inspired by two lovely sewists that I've had the pleasure of meeting online, Emily of In the Folds and Rebecca from Vida Doce. I have more of these tops than I can count and this one quickly became a favorite. I've been wearing it at least once a week since I finished it, usually with my Birkin Flares (yay! for me-made). But without further ado, on to the details of this top.

DIY Zip Back Lou Box Top Variation | Sew DIY

When Emily of In The Folds and I swapped patterns a couple months ago, she made a Lou Box Top with a seam at the hem section. The pattern comes with three different hem styles that you can mix and match. The pattern pieces for the hem are separate from the body making it really easy to lengthen or shorten and as Emily so cleverly did, add a seam. Adding a seam at the hem extension, can save you a bit of fabric and also adds a nice detail. You can even use a different fabric for the hem to create a color blocked top.

DIY Zip Back Lou Box Top Variation | Sew DIY

The next feature I added to this top was inspired by Rebecca. She asked on Instagram if I had ever done a zipper back version and I was shocked to realize that I had not. I decided to do an exposed zipper to really showcase this feature. I found a great metal zipper in my stash and set to work.

DIY Zip Back Lou Box Top Variation | Sew DIY

How to sew a Zip Back Lou Box Top with Hem Seam

Notes: 

Here I made View A with the straight hem and crewneck.

The zipper should be not be longer than the body piece. Mine is 11 inches.

I did french seams in this top everywhere except for the center back around the zip.

Step 1: Cut the hem pieces separately from the body, adding an extra .5 inch seam allowance to each hem piece and body piece along the side with the half circles. Do not cut out button loop.

Step 2: Install the zipper. Place zipper against center back seam with the zipper stop .25 inch below the raw edge. Mark where the bottom of the zipper is. I used this tutorial from Megan Nielsen to install the zipper. It was so easy to do. It took all of 15 minutes to complete and made me feel like a rockstar.

Step 3: Stitch front hem to front body. Stitch back hem to back body. Finish the top as usual: shoulder seams, sleeve hems, side seams and neck binding. Photos of all those steps can be found in the Lou Box Top Sewalong.

DIY Zip Back Lou Box Top Variation | Sew DIY

The fabric is a light weight gray linen type that I picked up in the LA fashion district. The fit of this top is intended to be very boxy and loose. I made a size M-L and have a 38 inch bust. The pattern is such a great basic that can be made in woven or knit fabric. I love how Lauren made one size smaller in a knit fabric for a more fitted t-shirt. I'm definitely going to have to try this soon. 

DIY Zip Back Lou Box Top Variation | Sew DIY

I released the Lou Box Top pattern a little over a year ago and I'm still finding so many ways to use it. Not only is it super fast to sew, it's also really versatile. The pattern is now available as part of the Indiesew Spring Collection. It's an amazing bundle of great patterns that will save you money and help you build an awesome spring wardrobe. For evidence, check out my Birkin Flares (seen here), Rushcutter Dress and Sanibel Dress

DIY Neon Zip Hoodie – Halifax Hoodie

$
0
0
DIY Neon Zip Hoodie – Halifax Hoodie pattern by Hey June | Sew DIY

I first saw the Halifax Hoodie by Hey June in the Indie Sew Instagram feed and almost, immediately I went a purchased it. Last year, I had an intense love affair with the Linden Sweatshirt by Grainline Studio. (I made about 5 of them!) But, I still felt the need for a zip up front hoodie in my life. Sometimes you just need the freedom to zip down and let a breeze come through. Or pop on the hood for a little added warmth. Hence, my rush to get this hoodie in my closet.

DIY Neon Zip Hoodie – Halifax Hoodie pattern by Hey June | Sew DIY

I was lucky enough to find this grey loop-back sweatshirt fabric at the Michael Levine Loft store in downtown LA. Then, while I was hunting for jeans zippers (for these jeans) I found this amazing neon orange separating zipper. I don’t remember the name of the store unfortunately but I do remember it was north of Michael Levine, on Maple. It’s very tiny with lots of beads and such plus a surprising amount of zippers spread throughout the store.

DIY Neon Zip Hoodie – Halifax Hoodie pattern by Hey June | Sew DIY

The zipper is a few inches shorter than is called for by the pattern so I shortened the body to accommodate. The shortening was a blessing in disguise because I had barely enough fabric. It took quite a bit of puzzling to squeeze it all in. There may have been some fist pumping in the air action when I got it figured out. ;) I really like the clean finish of applying the cotton twill tape to cover the zipper tape on the inside. You can see what it looks like on my Instagram.

DIY Neon Zip Hoodie – Halifax Hoodie pattern by Hey June | Sew DIY

If you’re looking for a sweatshirt pattern, this is definitely one to consider. It has five different views, including a pullover with angled seams and dip hem that looks super cool. The construction went really smoothly. I mostly used my serger which is super fast and easy once you get the tension right. Seriously it takes me way longer to balance the tension than to thread the blasted machine.

DIY Neon Zip Hoodie – Halifax Hoodie pattern by Hey June | Sew DIY

One thing I was thinking about when installing the zipper was what kind of stitch I should use. For knits, it’s important to use a stitch that has stretch but here we’re sewing it to a zipper tape that doesn’t stretch. So I just went with a regular straight stitch. Let me know if you have any advice on this. I also did a straight stitch around the hoodie/neckline to hold the facing in place. I don't think the neck seam will get too much stretching so I'm not worried about the seams popping. There just wasn't enough room to do my usual twin needle treatment.

DIY Neon Zip Hoodie – Halifax Hoodie pattern by Hey June | Sew DIY

There are a few minor changes I’ll do next time though. 1. I won’t serge the interior side of the pocket in the beginning, instead serging it together with the center front edge. 2. I might shorten the sleeves just a little bit. And I’ll definitely do this shorter length again. I’m 5’11” but the pattern is already long enough for my liking. 3. I’ll make the buttonholes for the drawstring on the hood much closer to the neckline. I’d also love to do an eyelet instead of a buttonhole for a really professional looking finish. 4. Figure out how to get a cleaner finish at the top of the zipper. My zipper had a flaw where the tops were partially cut off and I didn’t think about making sure it was finished until the very end. It was a little tricky to get it cleanly done but it worked out.

DIY Neon Zip Hoodie – Halifax Hoodie pattern by Hey June | Sew DIY

I love this sweatshirt soooooo much. I was working from home last week and wore it pretty much everyday, including out on a weekend night! It’s so comfy and oddly I think it’s kind of slimming. I don’t know if I’ll make another one soon but it’s definitely going in the success pile.

What's Up Sew World Vol. 9

$
0
0
Clockwise from top left: Lupin Jacket by Deer & Doe  //  Leather Bucket Bag by Ada Spragg  //  Vogue V1501 //  Driftless Cardigan by Grainline Studio

Clockwise from top left: Lupin Jacket by Deer & Doe  //  Leather Bucket Bag by Ada Spragg  //  Vogue V1501 //  Driftless Cardigan by Grainline Studio

Hi sewing friends! Well it's been another couple of busy weeks. I'm working a lot designing, patterning and trying to train my kitten just be a cool cat. It's a work in progress but I think we'll get there eventually. He's an adorable little guy and I love having him. I'm getting super close to launching my next pattern. It's both exciting and stressful. And of course I'm already thinking about the next pattern and hankering to start it. Meanwhile, I've rounded up some things happening lately around the sewing world. Let me know in the comments if there's anything I missed. Happy sewing!

SEWING PATTERNS

Vogue Patterns released a new Summer collection of patterns and I especially love Vogue V1501 by Rachel Comey (shown above). There’s also a really sweet swimsuit pattern Vogue V9192.

Deer & Doe released three new patterns for Spring, the Lupin jacket, the Sweet Clover Shirt and the Zephyr Dress. The jacket is definitely my favorite. It's also a category of my wardrobe that I think could be filled in a bit.

Grainline Studio released the Driftless Cardigan. It’s exactly the kind of cardigan that I buy and wear everyday but I’ve never sewn one. I’m going to have to add this to the long list of Grainline patterns currently in my queue.

The Zinnia Skirt is the pattern of the month at Collette which means you get 20% off. Yay!

Blank Slate Patterns released the Rivage Raglan which can be made into a top or dress. I’d love to have a sweatshirt dress!!

TIPS AND TUTORIALS

Sophie of Ada Spragg has a new Skillshare class to learn how to make a leather bucket bag. It’s totally chic and utterly gorgeous as you can see in the photo above.

How to Add an Elastic Waist to the Rushcutter Dress from IndieSew

The Foldline has a new Sewing Resources section with helpful categories like Pattern Tutorials and  Sewing Supplies.

DIY Quilted Cloud Oven Mitts from DesignSponge

Melly Sews explains the differences between conventional, serger and overstitch machines.

6 Apps to Plan your Sewing from Collette

I’m loving these crocheted pot scrubbers from Food 52. Find some patterns for making your own here.

It’s almost Easter so that means it’s time for bunny DIYs! Check out this cute Bunny Treat Bag by Lace and Pine. 

And if need more hoppy-ness, check out my Bunny Coin Purse tutorial.

IN OTHER NEWS...

Along with nine other amazing sewists, I was selected to be a Bernina Ambassador. It’s a very exciting and I’m very flattered to be in such good company. Thank you to everyone who voted for me on Kollabora.

IndieSew released a new fabric collection yesterday called Nightfall. Get it while it lasts, which is never long.

Instagram announced that it will gradually change the way photos are displayed in your feed, opting for photos they think you’ll like over the straightforward chronological format it currently has. Folks are up in arms. They're boycotting all day today and there’s a petition you can sign right here

Closet Case Files is doing a Sizing Survey and Pattern Giveaway. I’d be fascinated to see the results of this survey.. 

Viewing all 289 articles
Browse latest View live